

This build was absolutely gorgeous! It was also the hardest my hands have ever worked. The clients were in the process of a kitchen remodel, they were wanting a dining table made but with some black walnut they had. We took a little drive to a Hazelnut Farm and there in the barn was a stack of black walnut her dad had saved. Her brother had made his family something from the black walnut and she wanted to have the dining table made with some of it.
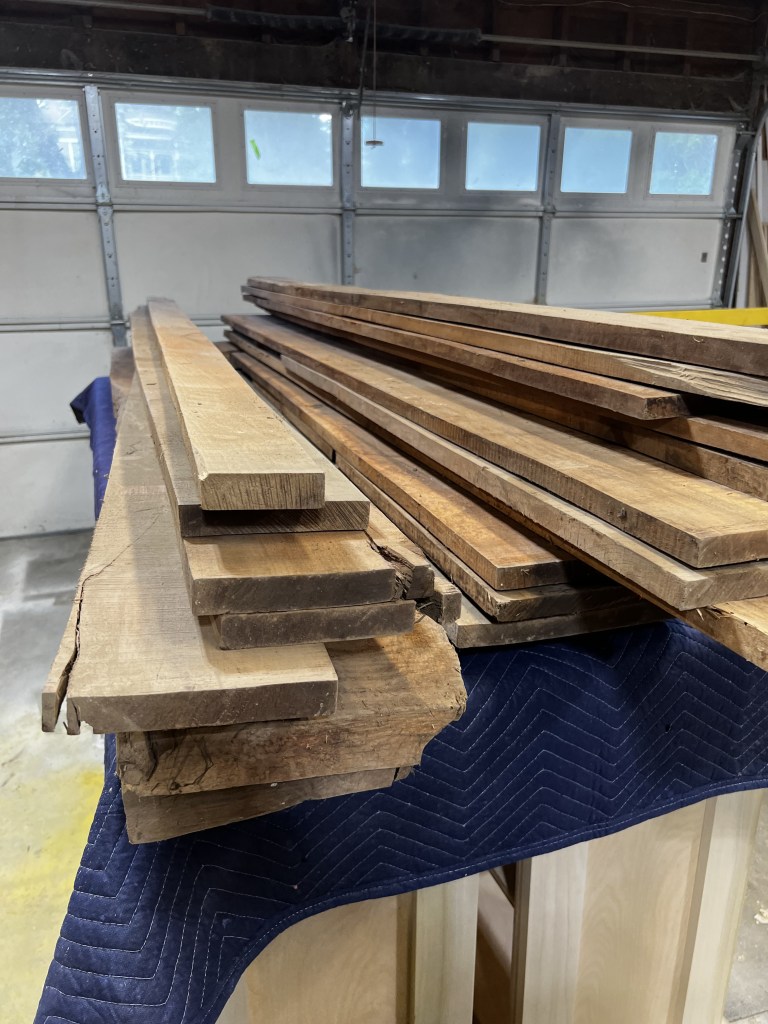
The deliver of the wood came and we let it sit in the shop for a while and we kept testing the moisture as it was in the barn for so long. Here is the stack after we picked through what might work for the table. A lot of the wood looked like this, with different lengths and widths.
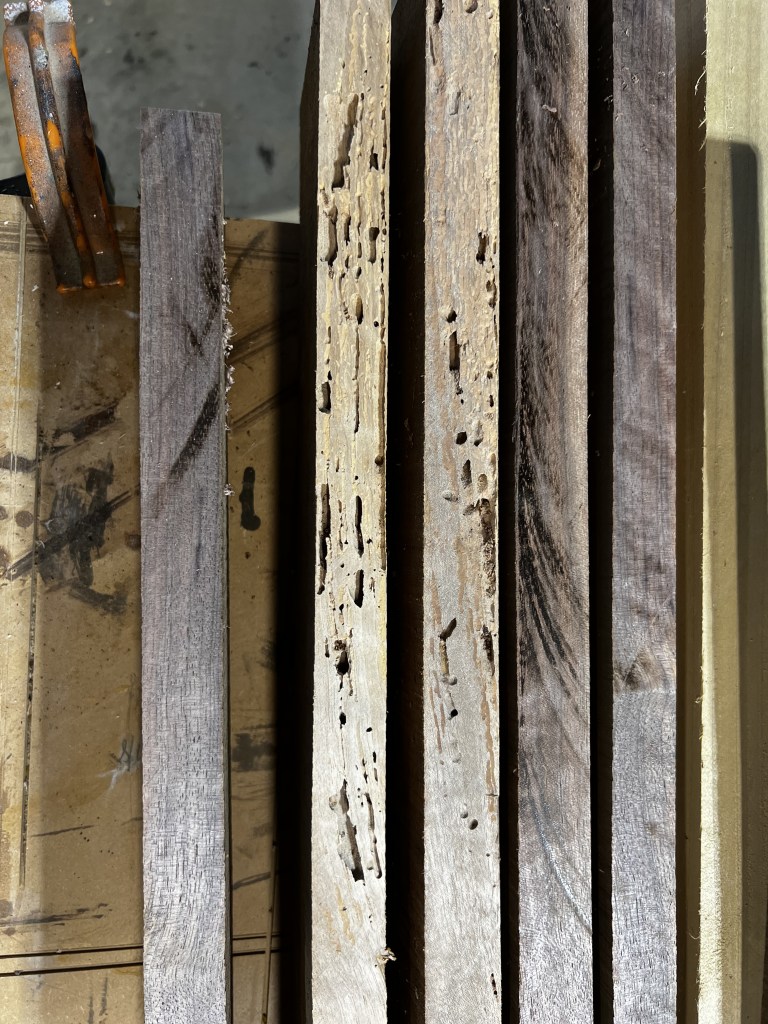
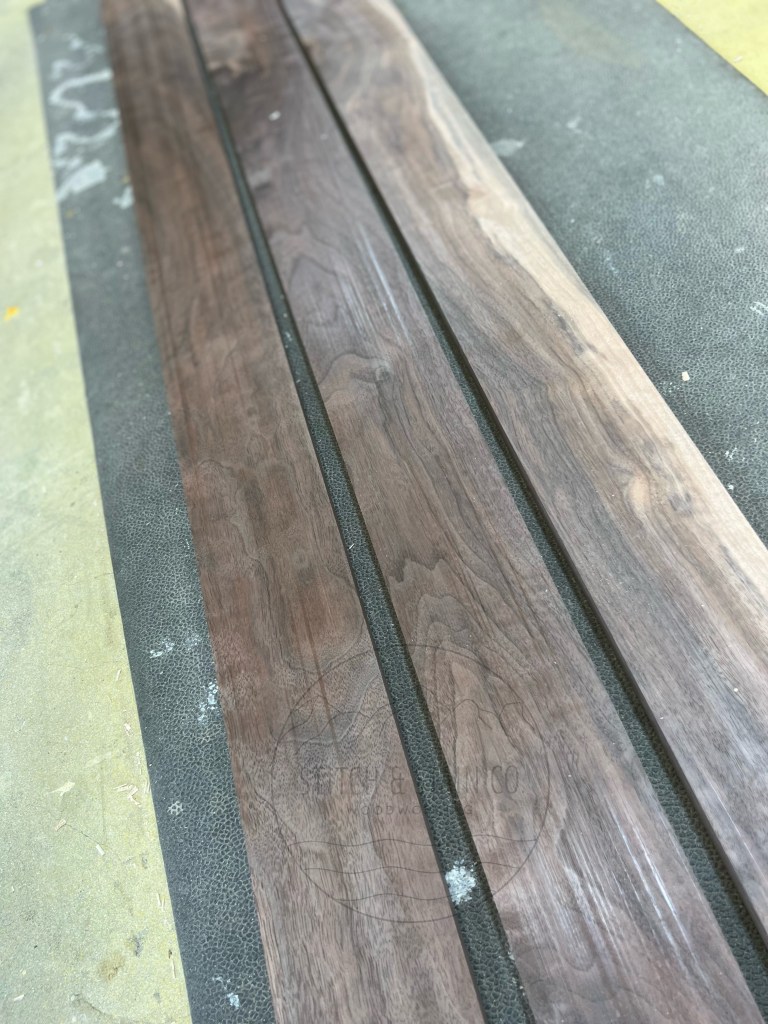
Some of it the bugs enjoyed. As we ripped through the wood, some looked like this inside and brittle. Fortunately we had so much to choose from that we had good pieces to work with. Some that were good had to be milled flat, since some of them had a little bowing

After a lot of milling and planing this what they looked like. This is where my hands worked really hard. They varied in width, but all that mattered was they were flat. Before we even started the top though, we ordered the legs.
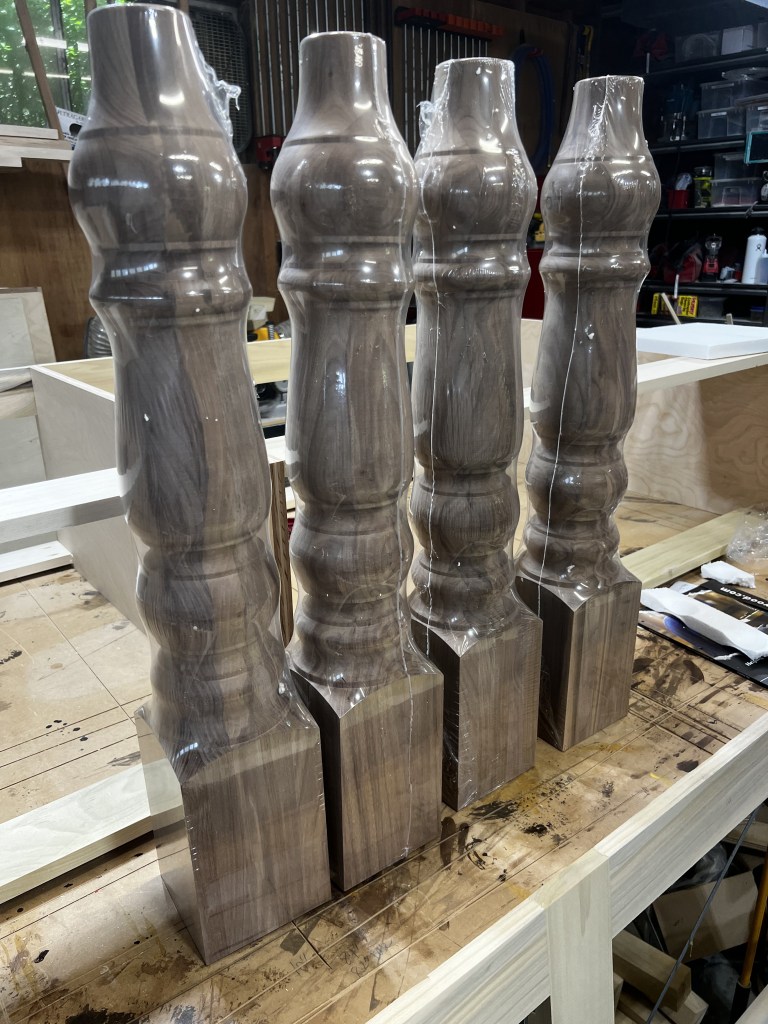
They matched perfectly. I wish I knew how to turn table legs, but I don’t. This was priority #1 as these can take a while to arrive since they were custom black walnut, it took a little longer than usual but they arrived and were beautiful.
Here are some of the top pieces before we glued them up.

All clamped up. There are some knots that we filled while the top was clamped. The base was next.
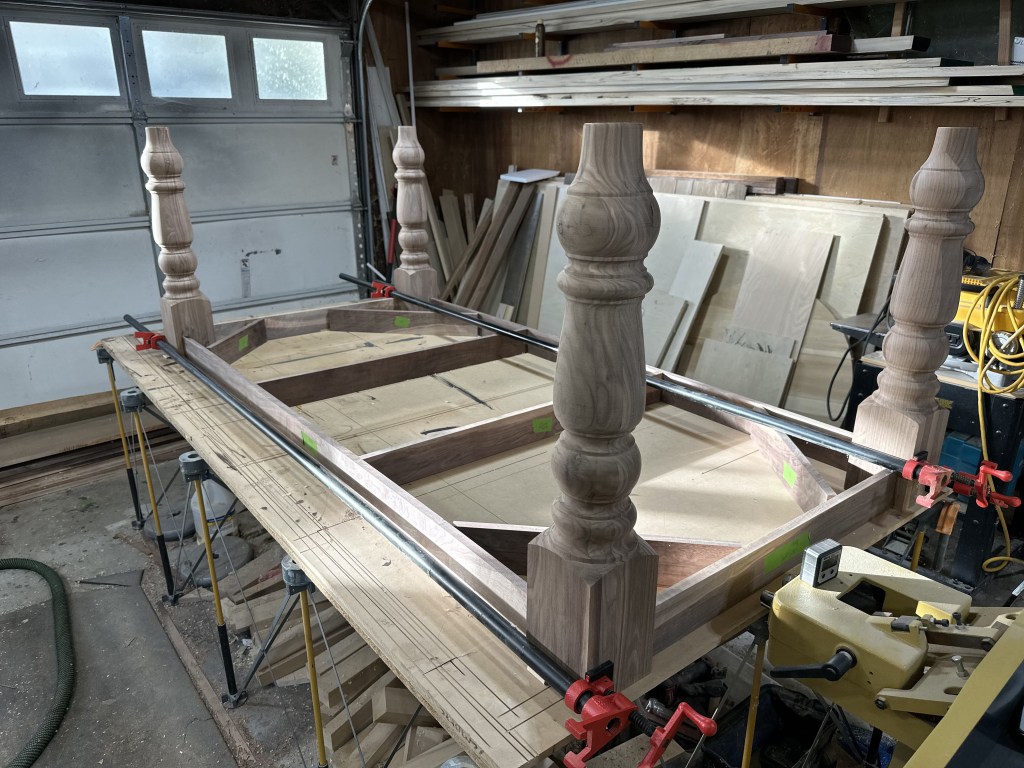
It was finally time to add the legs to the table frame. This was nerve racking since these are BLACK WALNUT and $$$!. We went over it probably 2o times. It’s not like we don’t know how to attach legs to tables, because we do. I think it was knowing how expensive these legs were and you can’t just make new ones. Well..at least we can’t. LOL! Just makes you nervous. It all went great though.

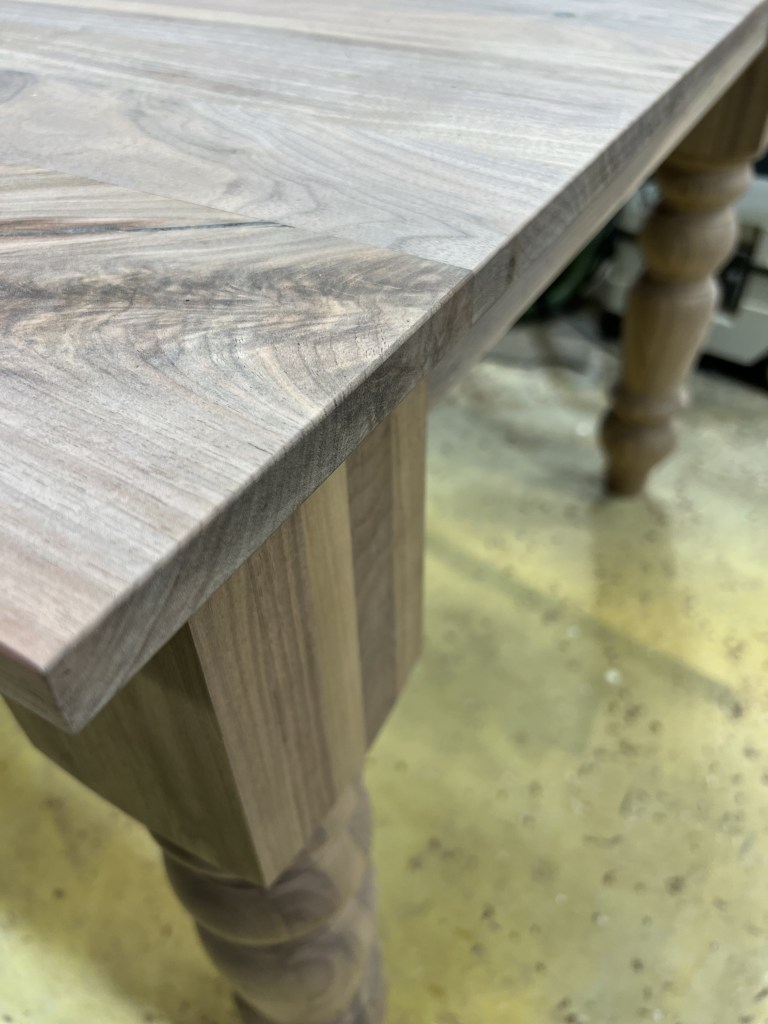
Here’s the top out of the clamps. It’s always fun to unclamp table tops and then flip them over and see what they look like. We sanded it right after to look like this.

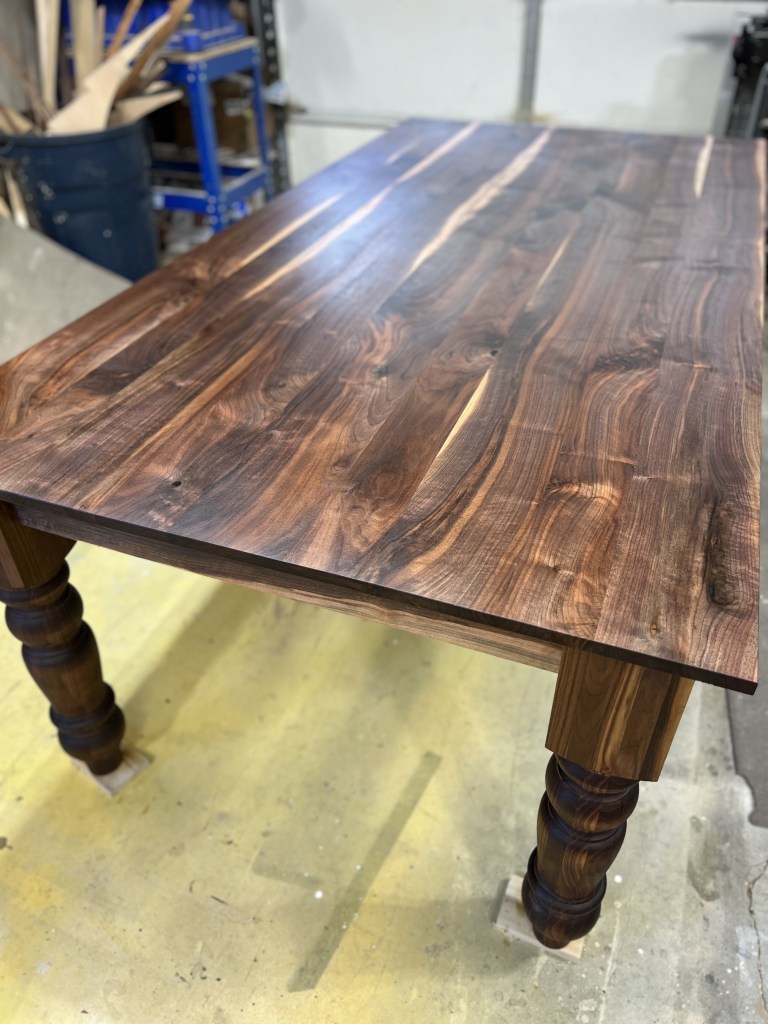
Dry fit looking great! You always do dry fit. It passed inspection and It was time to add the stain. We used Rubio Pure. It’s a plant based, hardwax oil wood finish that is 0% VOC. It keeps that natural look we want and protects it.
We’ve used this on white oak and black walnut builds, especially if all you’re wanting is that natural look. The smell is A LOT better then stain, but still needs time to cure and allow the smell to go away. After about 5 days, the surface can be used and cleaned.

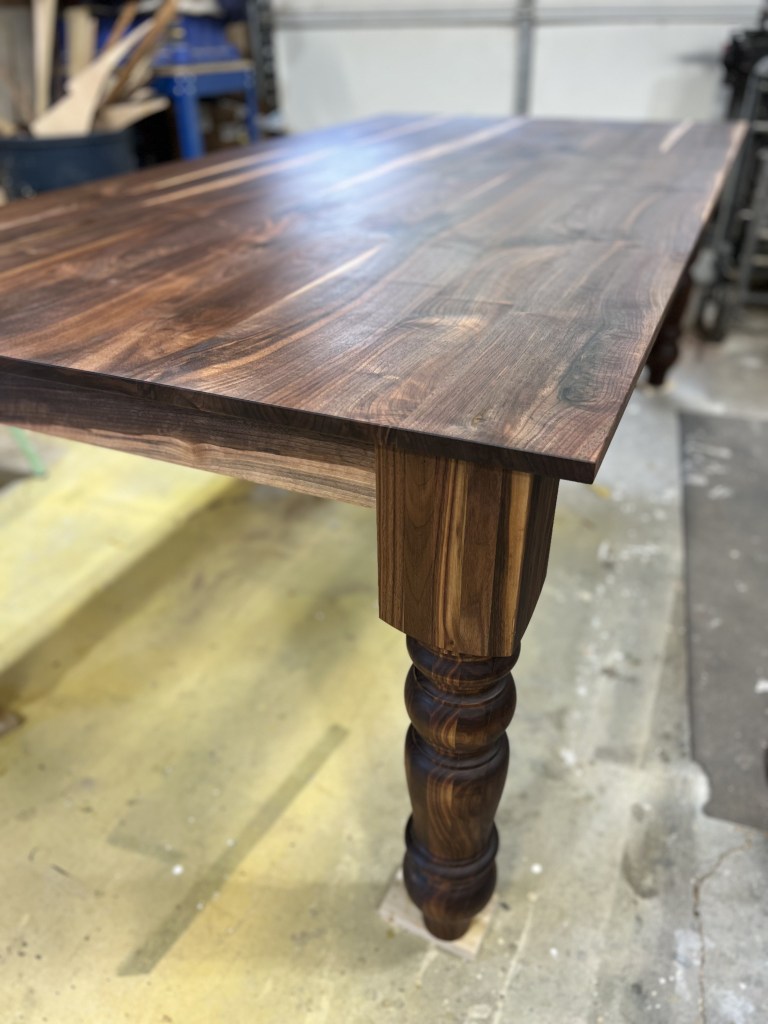
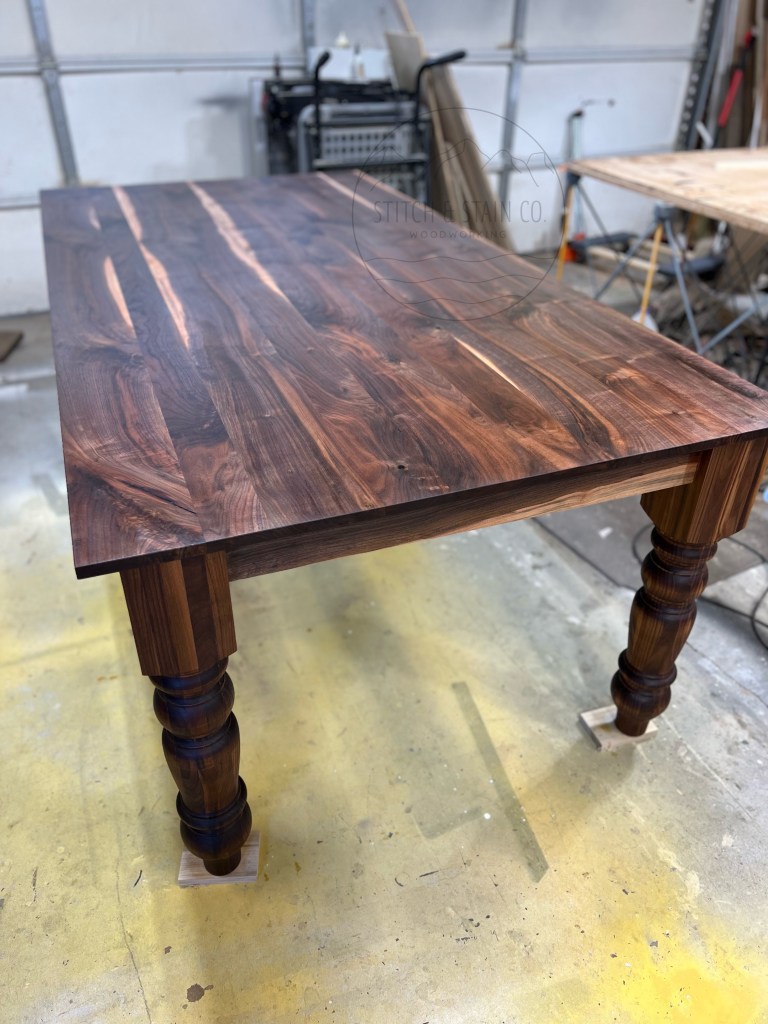
It’s amazing how much it pops with the Rubio. Again, the variations of color are just beautiful. We sent this pic to the clients and they loved it! I like to send a video as well so you can get a good look of the whole build.
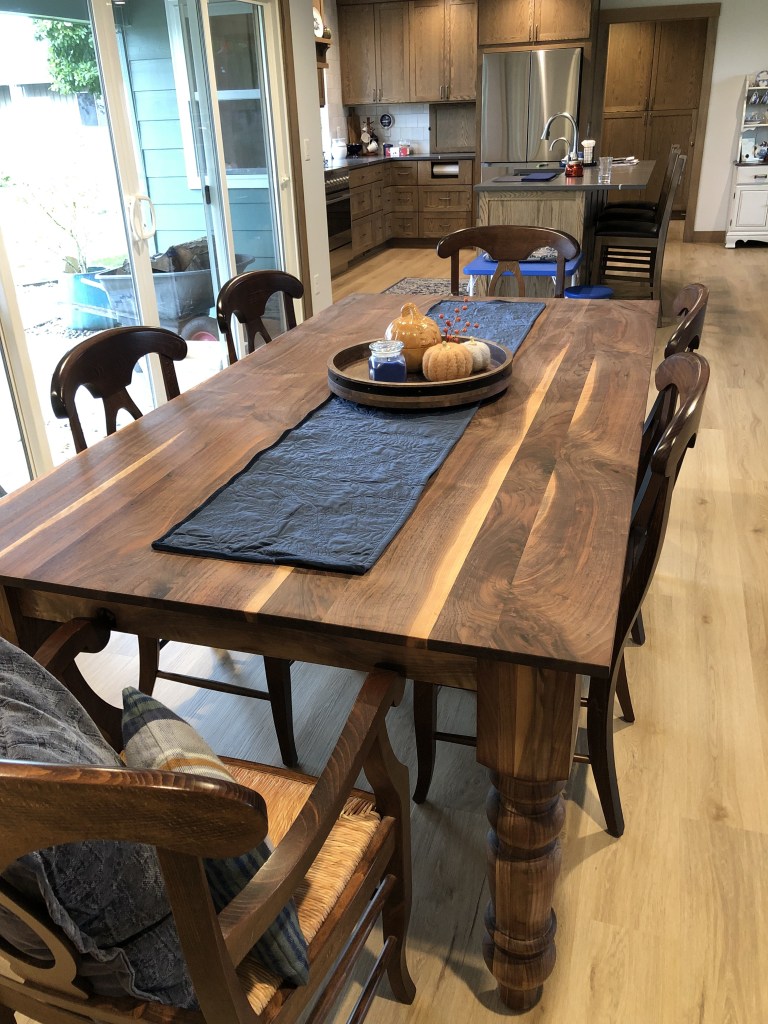
Pick up day came and soon the table was in it’s new home. I got a Thanksgiving update as well with the table. I love those kind of messages. I love that there will always be memories made at the dining table.


Leave a comment