

Back in 2022 we had a local family reach out about a dining table for their home. They wanted something that would last a long time and hold up with kiddos. They chose Maple over Poplar since it was a harder hardwood. I’ll be honest, Maple is one of my least favorite woods, because it’s HEAVY! I mean Im pretty strong, but moving anything maple on my own is a pain in the booty. However, my favorite part about Maple is how beautiful it looks stained.
One of my dining tables I made is actually Maple and that table is like a craft table in our house.It’s been through it and still looks amazing. Recently ( 2 weeks ago) I just switched tables with my parents and the reasoning was because the kids were hard on the other dining table they had which is Poplar (made by me) and it had some good dents from the kids. Now, Poplar is a great Hardwood. It stains, paints nicely but it’s a softer hardwood. I don’t’ mind the dents because over time it adds character to the table, but my parents didn’t want something so pretty getting more dings. Anyways, the 8ft table is back in my Dining Room looking pretty.

Back to the round table. The unique part of this table is the base. We’ve never done a table like this, but it was so cool that we knew we could figure it out. It was based off an inspiration pic she found, I believe it was one of those big fancy furniture stores that looks like a hotel. You know the one, I speak of. They have lots of furniture we’ve based some builds over. After finalizing all the details, we got to work on what we called the Pyramid Table.
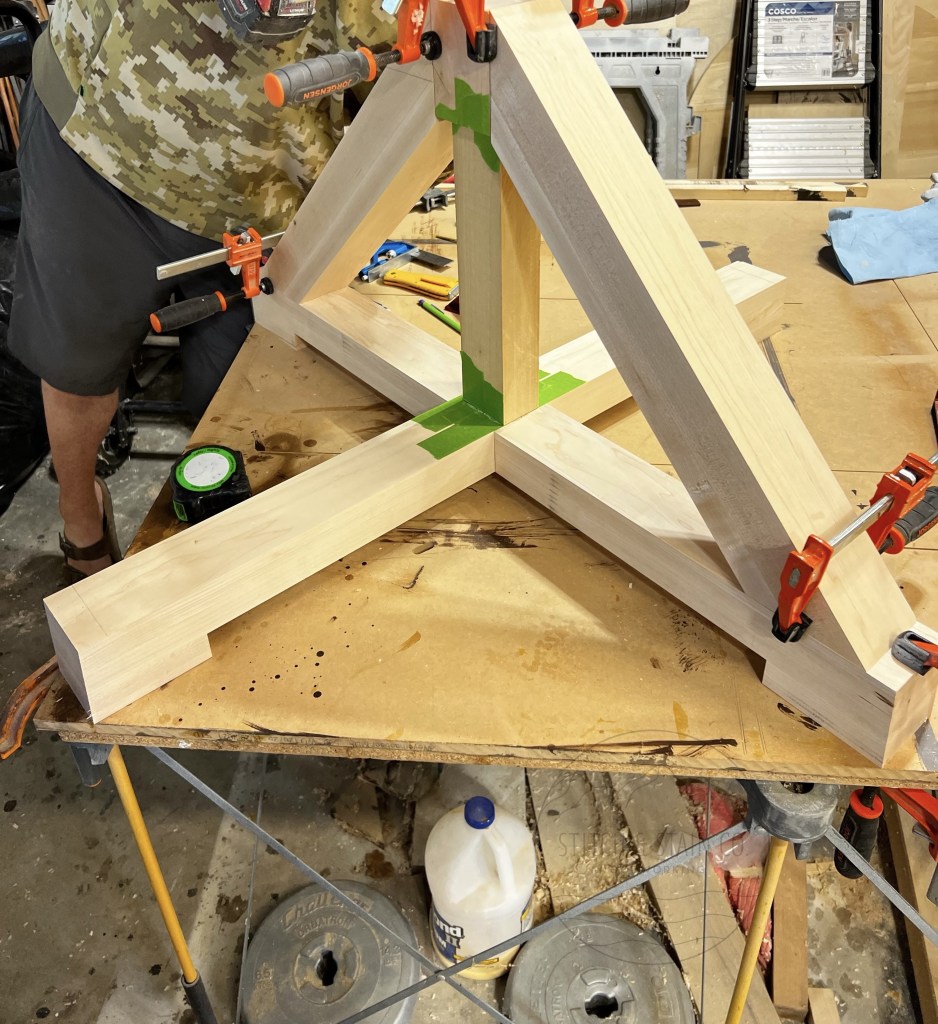
Here’s the base all clamped up. That piece of wood in the middle, is holding up that block that is holding up the pieces on the bottom and the top. I don’t know how, but let’s just say physics. When it was done it looked like this.
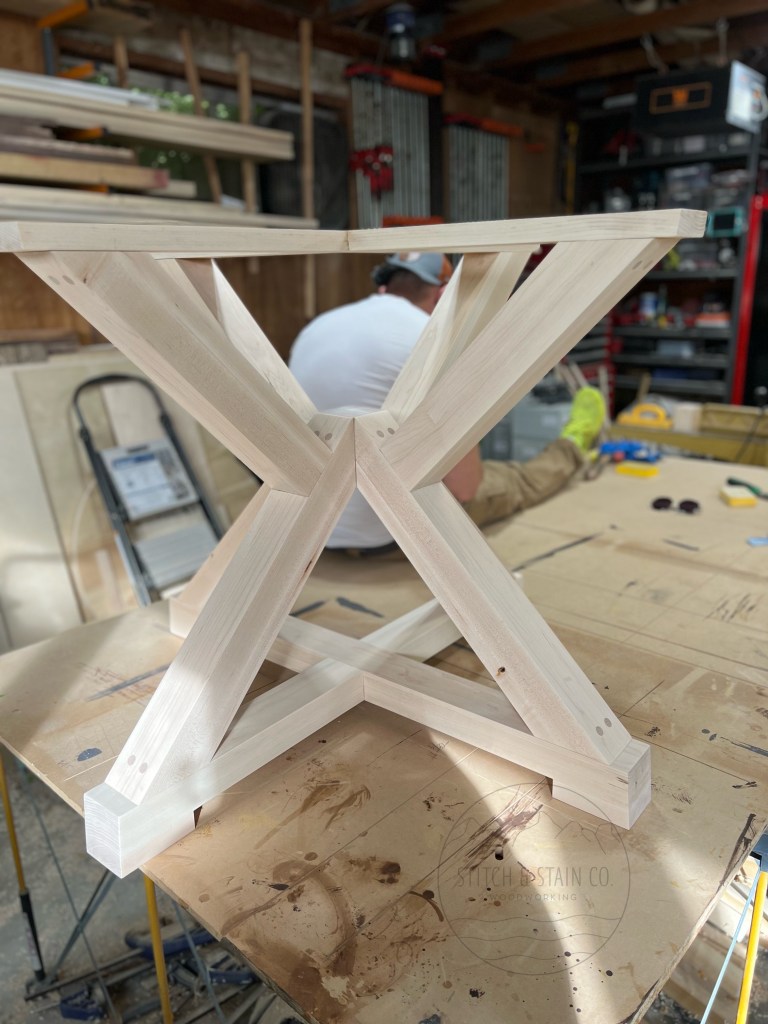
We did our standard test as we do on most of our builds, we stand on it. It was solid, it’s now ready for the sanding and stain. Now it’s time for the top. This is what the Maple looked like before I milled it all up, took it to the joiner and made it look pretty. I like to lay out my pieces to see if my math was right for the width, once it looks good I label them all so I remember what goes where.
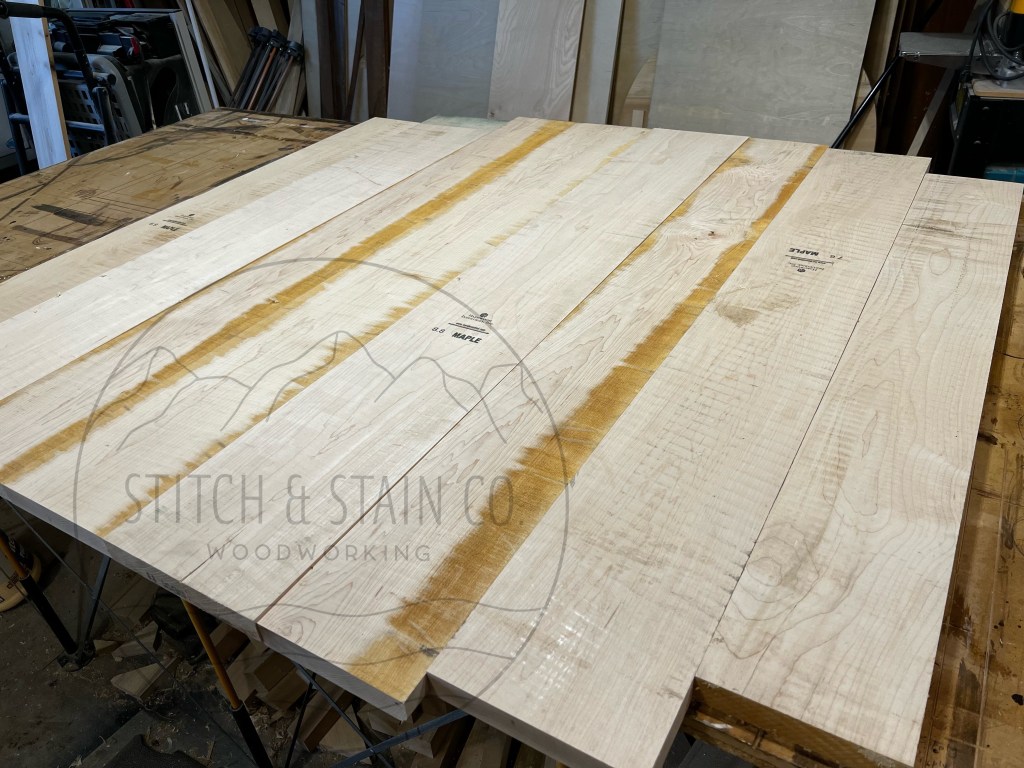
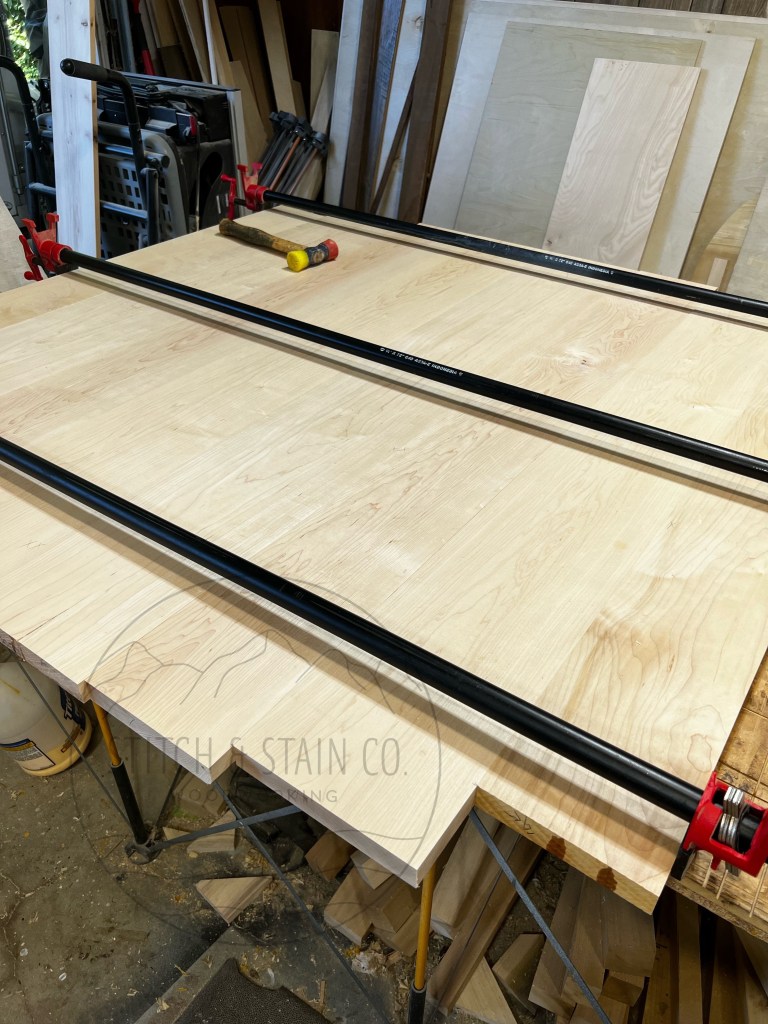
Taa daa! After all the jointing and planing they look like this all glued up in the clamps. I let my tops sit in the clamps for at least 24hrs.
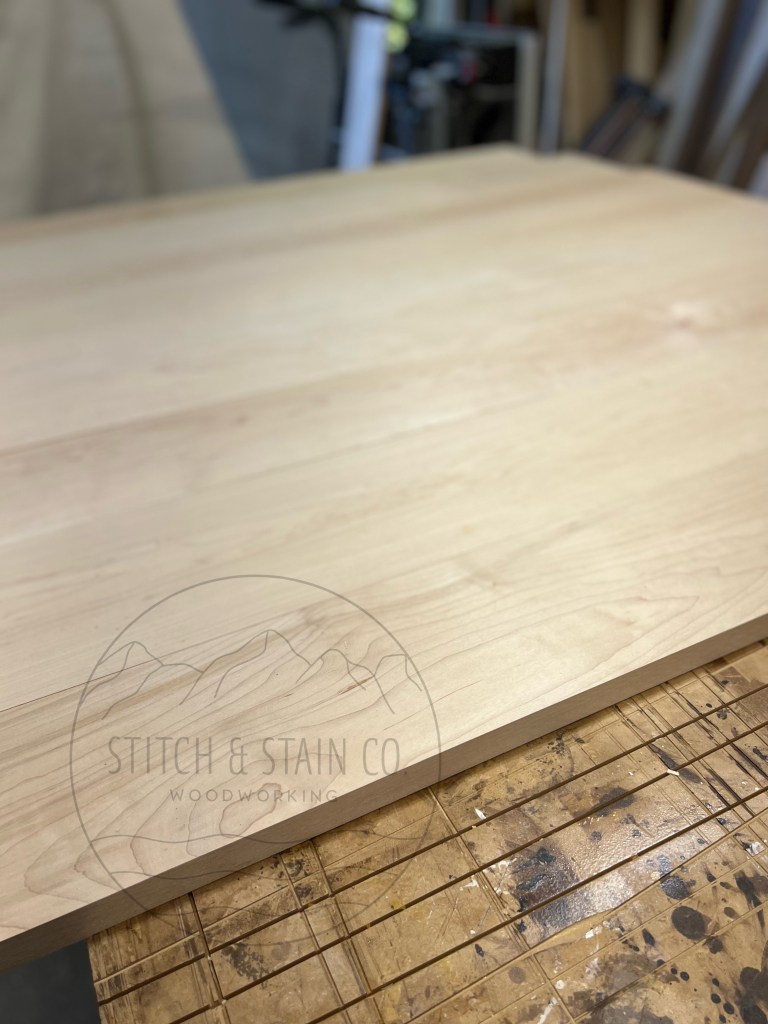
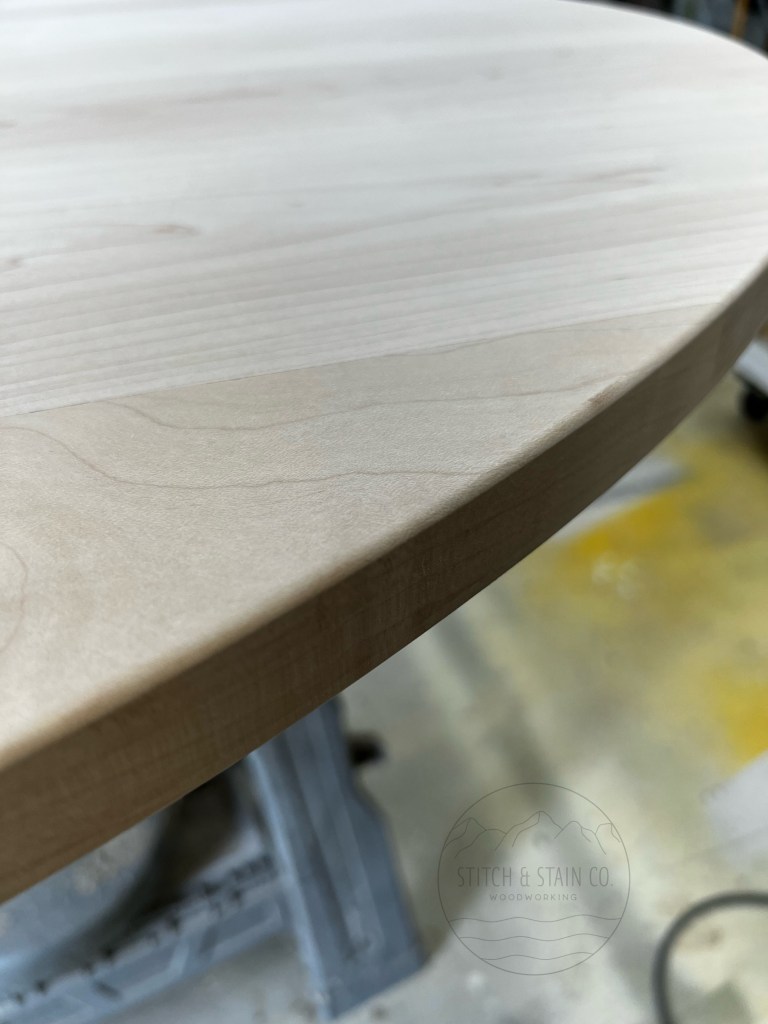
Even before sanding, it looks pretty! After unclamping I cut the circle out with our circle jig, and rounded the edges of the table so there was no sharp edges. Then gave it a good sanding.
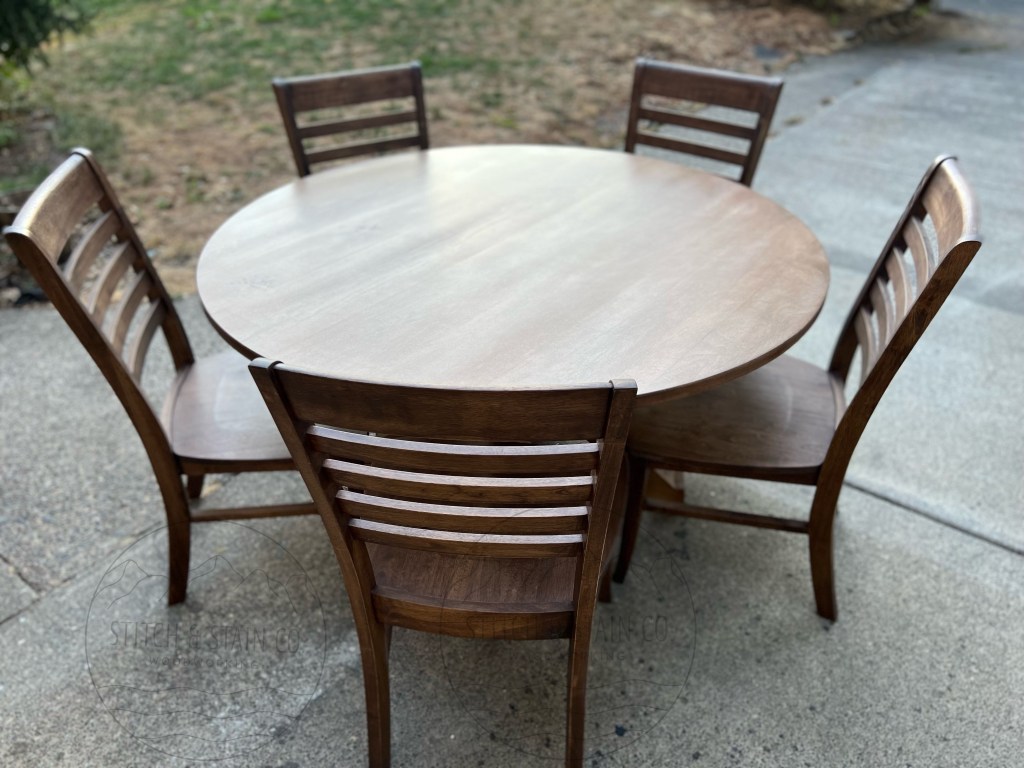
I don’t remember the order I did this all, but there are chairs. As pictured above they ordered chairs to match. We don’t make chairs. That’s one build I don’t have patience for yet. We order them online and they come unfinished so we put them together and give them a light sanding before adding any stain. Then finish them off with a couple coats of poly. They do have several styles to choose from though.
Staining day came and it was time to stain.I usually do the base first and go from there on everything else. I usually do 1-2 coats of stain on builds. Depending on what stain I’m using, I let it sit for 24-48hrs before adding the poly. For the poly, again depending on what poly you’re using, I wait 48hrs before clients pick-up or we deliver. That way it’s had time to cure before using it and for the smell to go away.
Doesn’t it look so pretty?! Never did I think I’d be making a Pyramid Dining Table but it was a really fun build for a great family. We’ll see if I get to make another one.


Leave a comment